...
...
...
...
...
...
...
...
...
...
...
...
...
...
...
...
...
...
...
...
...
...
...
...
...
...
...
...
...
...
...
...
...
...
...
...
...
...
...
...
...
...
| Table of Contents |
|---|
In this KB we are going to learn how to install the Access Portal site and DB
Before proceeding make sure to follow this KB in order to generate the user properties file.
Configuration
- Right-click the installer .exe file and click Run as an Administrator
- When prompted with the following window select the option the matches your deployment method.
If no properties file was detected you will be asked to choose (if you have).
Click yes, to specify a file and no to proceed without specifying. The default location of the file should be a
C:\Agat\SphereShield.Setup
If you have a properties file skip to #6
Else keep going
- Fill out the right information for your SQL server (you can name the database however you want)
For a detailed explanation on this page, please refer to the Database Configuration section in the initial configuration guide.
Click and proceed to the next page - Fill out the information for your Access Portal site
For a detailed explanation on this page, please refer to the Access Portal section in the initial configuration guide.
Click until you reach the Install'page.
Installation
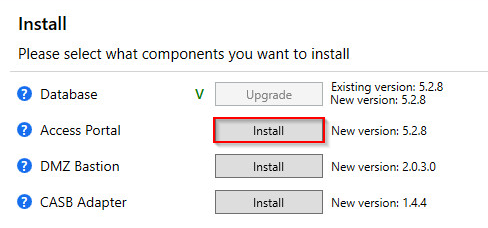
- In the following page, you'll be able to find the various components that are available for installation and their versions.
Click the button next to Database
After a successful installation, you should see a green checkmark () next to the button and label mentioning the version that is installed. - Proceed by clicking the button next to the Access Portal
After a successful installation, you should see a green checkmark () next to the button and label mentioning the version that is installed. - Click here to proceed with configuring and to register SphereShield app in Microsoft Azure.


