How to Install the SIP Filter on the Front End?
In this article, we are going to learn how to install the SIP Filter using the SphereShield installer.
Before proceeding make sure to follow this KB in order to generate the user properties file.
Installation
1. Right-click the installer and run it as an administrator.
2. When prompted with this window click 'SphereShield for Skype for Business'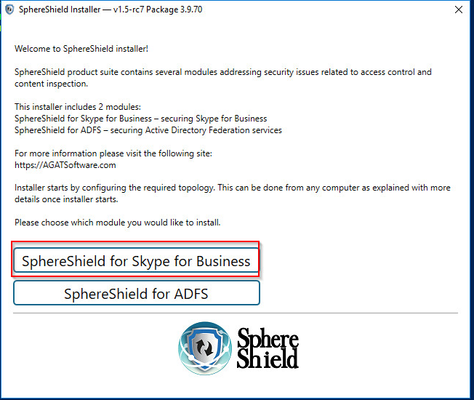
3. If no properties file was detected you will be asked to choose (if you have).
Click yes, to specify a file and no to proceed without specifying. The default location of the file should be at:
C:\Agat\SphereShield.Setup
4. On the SIP Filter page make sure you've checked the box next to 'Install on Front End'
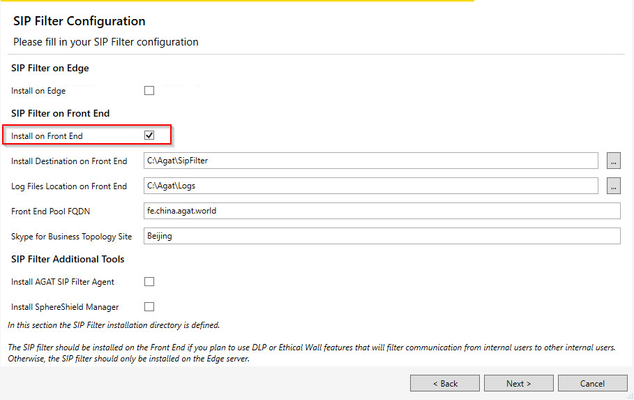
Make sure to input your Front End FQDN and Site name as defined in your topology.
5. On the 'Install' page click the  that is next to 'SIP Filter on Front End'
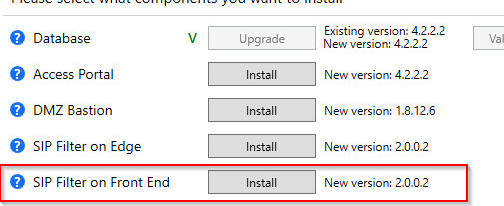
After a successful install, you should a green check next to the Install button
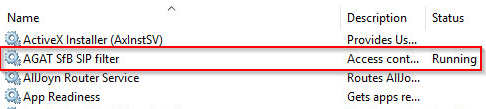
After you're done click finish and make sure that a new service has been added to your services: