How to configure UCMA Integration with SphereShield?
General
NOTE: see more info on UCMA here UCMA General Information
UCMA integration is required for the following scenarios:
- Configuring Ethical Wall Policy rules based on Contact List
- Sending IM Notifications to users and admins
- Enabling the Disclaimer feature
Unified Contact Store must be disabled on the Skype for Business Frontend pool for Contact List based policies to work
for more information see the following section
UCMA integration requires NTLM to be enabled. Otherwise, the integration will not work. NTLM should be enabled by default and typically would require a policy to be disabled.
Overview
- Trusted application user - A SIP address that isn’t already taken that the Services can use (this should be something like “SkypeShieldAdmin@domain.com”).
- Lync Pool Name - The name of the Lync/S4B pool as it is defined in the Topology.
- Access Portal Server Name as registered in the domain - FQDN of the Access Portal site, This is to give permissions to that specific server to use Lync/S4B server privileges to send messages.
- And Server Certificate ( Application server Certificate ) - Will be used in the installation of the Lync/S4B server components.
- Lync Site name - The name of the Site as it appears in the Topology
Installation
Configuring the pool and applications of the Access Portal server
Generate Powershell Script
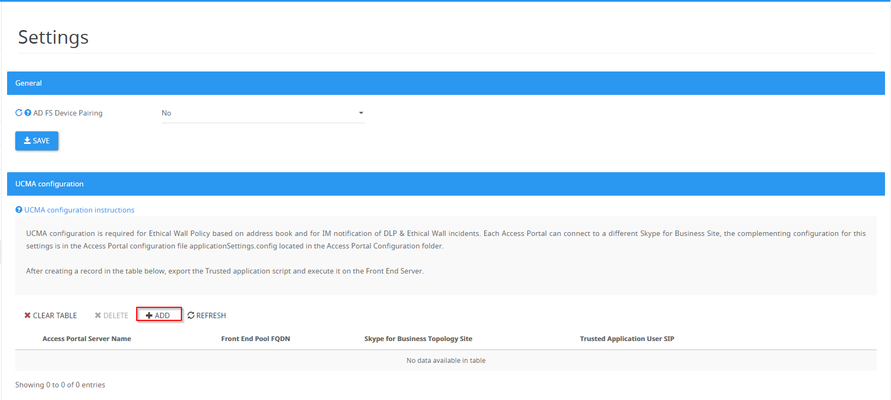
After you've gathered the information mentioned above open the [Settings] → [General] in the Admin Portal navigation menu.
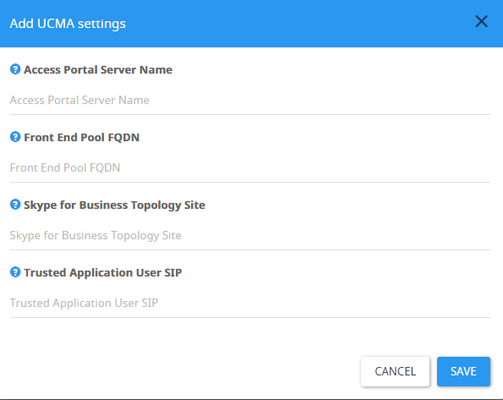
Click Add and fill in the required details:
- Admin Portal Server Name - The hostname of the server hosting the Admin Portal site.
- Front End Pool FQDN - The FQDN of the front end server hosting the pool.
- Skype for Business Topology Site - the name of the site as defined in the topology.
- Trusted Application User SIP - SIP address that is not in use for the services to use.
After you're done configuring the UCMA setting save, click and move the script to your front end server.
In your front end server execute the Powershell script and will perform the following tasks:
- Creation of “Trusted application records” which are records that will allow SphereShield to use resources in the SfB (like sending IMs and getting the contact list of a user).
- After the first Trusted application records have been created, the script will ask if a SIP Filter is installed on the FE and if it does additional records will be created. This will create two separate Trusted applications, One for
the Maintenance Service and one for the SIP Filter. (Installing the SIP Filter on the FE is required in order to pull the contact list of a user for the Ethical wall policies).
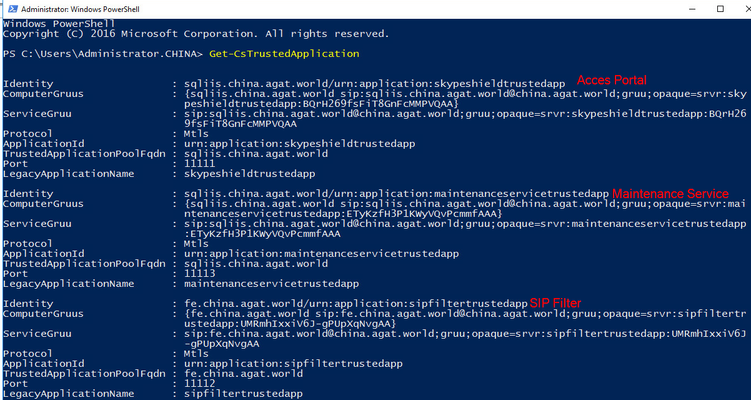
To verify that all the Trusted Application have been created run the following Powershell command
Get-CsTrustedApplication
Prepare the portal for the UCMA on the Admin Portal server
The next step in deploying UCMA integration should be installing UCMA the Admin Portal server that is running the Housekeeping/Maintenance service. It is necessary that the Maintenance Service will be running in order for UCMA to work effectively.
- Install UCMA 6.0 for Skype For Business 2019 version
- Install UCMA 5.0 for Skype For Business 2015 version
- Install UCMA 4.0 for Lync 2013 version
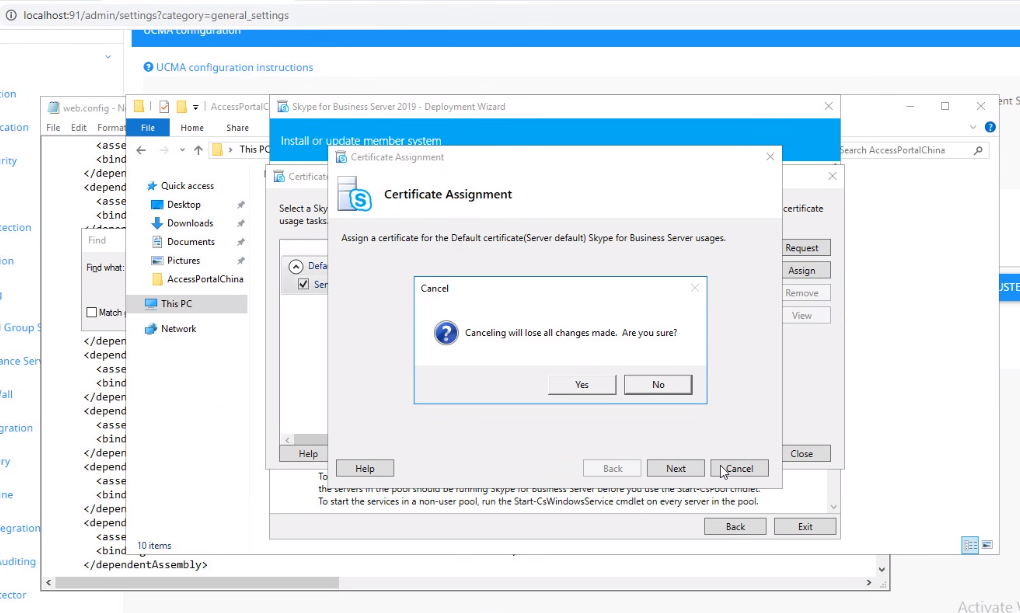
After we're done installing the UCMA, we will need to edit the web.config file of the Admin Portal.
Its default location is
C:\inetpub\AccessPortal\web.config
In that file find the Microsoft.Rtc.Collaboration.dll’s lines
Replace these lines with the following:
- For UCMA 4.0
<dependentAssembly>
<assemblyIdentity name="Microsoft.Rtc.Collaboration" publicKeyToken="31bf3856ad364e35" culture="neutral" />
<bindingRedirect oldVersion="0.0.0.0-6.0.0.0" newVersion="5.0.0.0" />
</dependentAssembly>
- For UCMA 5.0
<dependentAssembly>
<assemblyIdentity name="Microsoft.Rtc.Collaboration" publicKeyToken="31bf3856ad364e35" culture="neutral" />
<bindingRedirect oldVersion="0.0.0.0-7.0.0.0" newVersion="6.0.0.0" />
</dependentAssembly>
- For UCMA 6.0
<dependentAssembly>
<assemblyIdentity name="Microsoft.Rtc.Collaboration" publicKeyToken="31bf3856ad364e35" culture="neutral" />
<bindingRedirect oldVersion="0.0.0.0-7.0.0.0" newVersion="7.0.0.0" />
</dependentAssembly>
Add the lines in the specified place if they don't exist
Install Server Core Components on the Admin Portal
Using an account in the domain CsAdmin group run the Lync/Skype for Business install wizard.
In the wizard install the Lync/Skype application components.
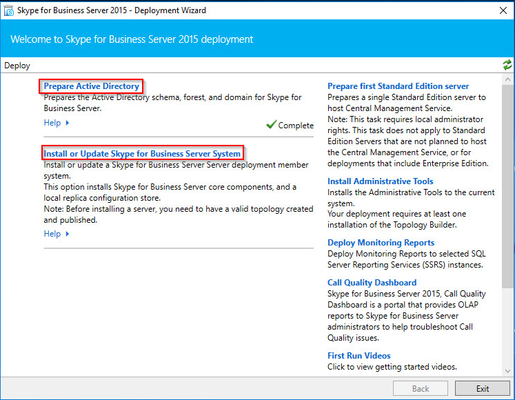
Install and Deploy a Skype Certificate using the Skype installer
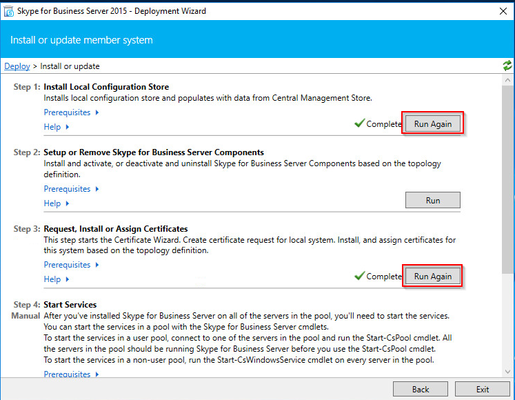
Install or Update Skype for Business Server System
Run step 1 and Step 3
Give permissions to access SfB data
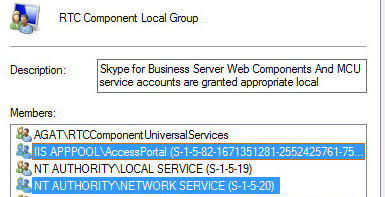
Add the user running the Access Portal (default is IIS apppool\accessportal) and the user running the Maintenance Service (NETWORK SERVICE user) to the following local computer groups:
- RTC Server Local Group
- RTC Component Local Group
- Administrators
Configure UCMA integration in the Admin Portal
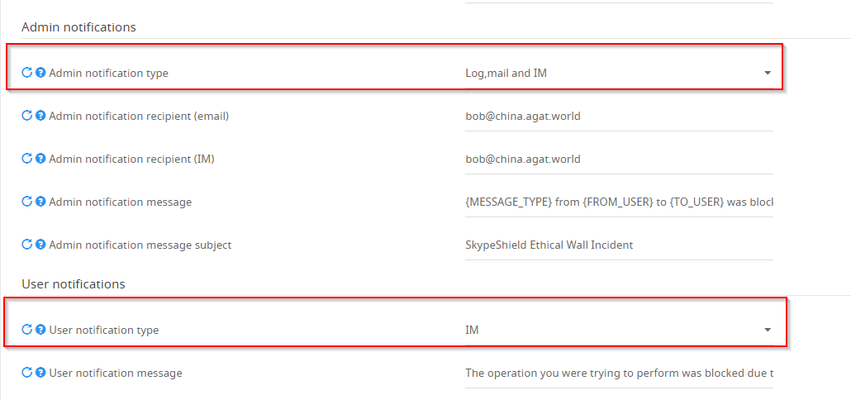
Navigate to the Notification settings page and make sure 'Enable IM notifications' is set to Yes
If you wish to have user and admin notifications for Ethical Wall violations, make sure to enable it on the Ethical Wall setting page.
In order to configure Maintenance Service to process IM messages, enable it on the Maintenance Settings page:
UCMA with Multiple Admin Portals/Front End Pools
When working with multiple Admin Portals/Multiple FE pools it is possible to define every Admin Portal/FE pool in the UCMA configurations.
In order to define multiple Admin Portals/FE Pools multiple table records should be defined, one for each instance of the Admin Portal/FE Pool.
Note that when working with multiple FE pools each “Trusted Application Script” should be executed on the appropriate Front end server.
For Example:
In the screenshot above we have two FE pools:
- pool.domain.com
- pool2.domain.com
In order to apply both UCMA configurations, you will need to export both scripts.
Each script will be needed to run on its appropriate front server from the matching pool.
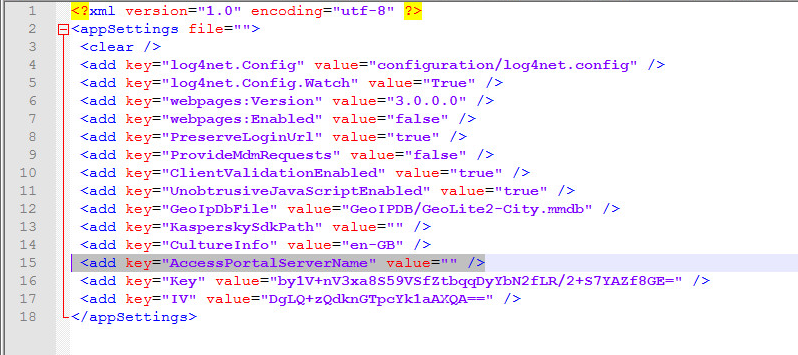
In each Portal server you need to edit C:\inetpub\AccessPortal\configuration\applicationSettings.config
In <add key="AccessPortalServerName" value="" /> you need to add server name, for example <add key="AccessPortalServerName" value="ap1.domain.com" />
Port 11113 needs to be open between Front End server and MNTS server
